Microsoft Access-gegevens importeren/exporteren
Inleiding
Microsoft Access ondersteunt verschillende scenario's voor het importeren en exporteren van gegevens, van en naar MS Access-databases, van en naar tekstbestanden, van en naar spreadsheets, enz. Voordat u gaat importeren, moet u een database maken die de records zal ontvangen.
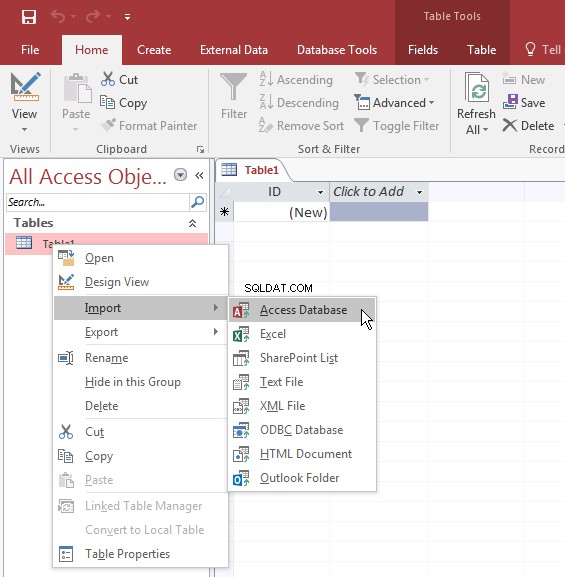
De belangrijkste manier om te importeren of exporteren is via de eigenschappenpagina Externe gegevens van het lint. U kunt ook met de rechtermuisknop op een object in het navigatiedeelvenster klikken, de muis op Importeren of Exporteren plaatsen en op de gewenste optie klikken.
 Praktisch leren:introductie van gegevensimport/-export
- Microsoft Access starten
- Klik op lege desktopdatabase
- Stel de bestandsnaam in als FunDS2
- Klik op Maken
- Klik op het lint op Bestand en klik op Opties
- Klik in de linkerlijst op Huidige database
- Klik in de rechterlijst op Overlappende Windows
- Klik op OK
- Lees het berichtvenster en klik op OK
- Dubbelklik in de standaardtabel op ID om in de bewerkingsmodus te komen, druk op F2 en druk op Home, typ SoldItem (om SoldItemID te krijgen) en druk op Enter
- Klik in het gedeelte Weergaven van het lint op Weergave (of Ontwerpweergave)
- Stel de naam in als SoldItems en klik op OK
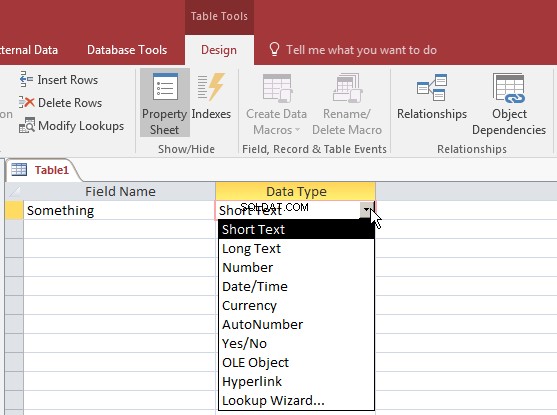
- Vul de tabel in met de volgende velden (wijzig alleen de aangegeven delen):
Veldnaam Gegevenstype Veldgrootte Formaat Bijschrift SoldItemID Verkocht Item ID ReceiptNumber Number Receipt # ItemNumber Number Item # Fabrikant 40 Categorie 25 Subcategorie 25 Subcategorie Itemnaam 100 Itemnaam Itemmaat 20 Maat Aankoopprijs Nummer Dubbel Vaste Aankoopprijs - Sluit de tafel
- Als u wordt gevraagd of u wilt opslaan, klikt u op Ja
- Als u een nieuwe tabel wilt maken, klikt u op het lint op Maken en klikt u in het gedeelte Tabellen op Tabelontwerp
- Typ Ontvangstnummer en druk op Tab
- Klik met de rechtermuisknop op ReceiptNumber en klik op Primaire sleutel
- Maak de velden als volgt aan:
Veldnaam Gegevenstype Veldgrootte Opmaak Bijschrift ReceiptNumber Number Long Integer Receipt # EmployeeNumber Number Long Integer Employee # ShoppingDate Datum/Tijd Lange Datum Winkeldatum ShoppingTime Datum/Tijd Lange Tijd Winkeltijd VerkoopTotaal Aantal Dubbel Vaste Verkoop Totaal Bedrag Aangeboden Nummer Dubbel Vast Bedrag Aangeboden - Sluit de tafel
- Als u wordt gevraagd of u wilt opslaan, klikt u op Ja
- Stel de naam van de tafel in als ShoppingSessions en klik op OK
- Klik op het lint op Bestand en klik op Nieuw
- Klik op lege desktopdatabase
- Stel de bestandsnaam in als Computer Training Center
- Klik op Maken
- Klik op het lint op Bestand en klik op Opties
- Klik in de linkerlijst op Huidige database
- Klik in de rechterlijst op Overlappende Windows
- Klik op OK
- Lees het berichtvenster en klik op OK
Een Microsoft Access-database importeren
Het eenvoudigste type gegevens om in een Microsoft Access-database te importeren, is een andere MS Access-database. Om een Microsoft Access-database te importeren:
- Als het navigatiedeelvenster ten minste één tabel bevat, klikt u met de rechtermuisknop op een tabel. Plaats de muis op Importeren en klik op Access Database
- Klik in het gedeelte Importeren en koppelen van het lint op de knop Toegang

Typ het in het dialoogvenster als u het pad naar de database weet, inclusief de naam. Als dat niet het geval is, klikt u op de knop Bladeren om de brondatabase te selecteren. Nadat u de database hebt opgegeven, klikt u op OK. Het dialoogvenster Objecten importeren wordt weergegeven. De objecten zijn geordend in categorieën. Selecteer de gewenste objecten. Naast de objecten kunt u aspecten als de relaties en andere opties in het navigatiedeelvenster importeren of negeren. Om te beslissen, klikt u op de knop Opties en selecteert u de gewenste opties:

Als u klaar bent, klikt u op OK. Als de objecten in de database geldig waren (en dat zouden ze ook moeten zijn), zou je geen probleem moeten hebben.
Praktisch leren:een Microsoft Access-database importeren
- Klik op het lint op Externe gegevens
- Klik in het gedeelte Importeren en koppelen van het lint op de knop Toegang
- Klik in het dialoogvenster op de knop Bladeren
- Selecteer CTC uit de bronnen die bij deze lessen horen en klik op Openen
- Klik in het dialoogvenster op OK
- Klik op de eigenschappenpagina Tabellen op Alles selecteren
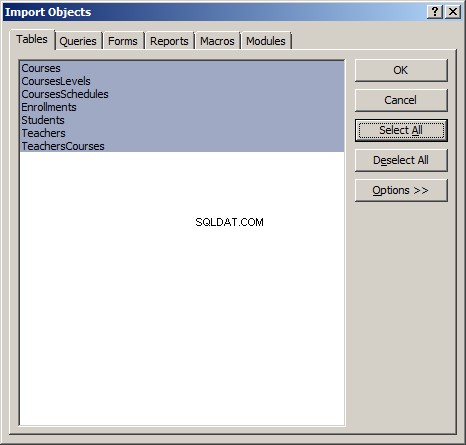
- Klik op het tabblad Formulieren en klik op Alles selecteren
- Klik op OK
- Als de objecten zijn geïmporteerd, klikt u in het dialoogvenster op Sluiten
Een Microsoft Access-database exporteren
Er zijn verschillende manieren om de records van een Microsoft Access-database te exporteren. Eén manier is om een tabel formeel te exporteren.
Een object exporteren:
- Klik in het navigatiedeelvenster met de rechtermuisknop op de tabel die de records bevat, plaats de muis op exporteren en klik op Toegang
- Klik in het navigatiedeelvenster op de tabel die de records bevat om deze te selecteren. Klik in het gedeelte Exporteren van het lint op de knop Toegang
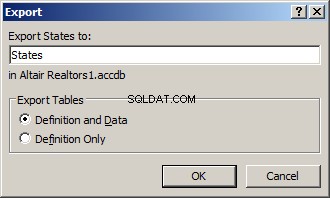
Als u op de eerste pagina van de wizard het pad naar de database weet, inclusief de naam, typt u het of klikt u op de knop Bladeren om de doeldatabase te selecteren. Nadat u de database hebt opgegeven, klikt u op OK. Dit zou het dialoogvenster Exporteren weergeven. Hiermee kunt u de naam specificeren van het object dat de records zal ontvangen of het object dat zou worden gemaakt. U kunt ook specificeren wat er zou worden geëxporteerd:alleen de structuur van de tabel of zowel de structuur als de records:
Met de bovenstaande techniek kunt u één object of één object tegelijk exporteren. Als u de hele database wilt exporteren, klikt u op het lint op Bestand en vervolgens op Opslaan als:
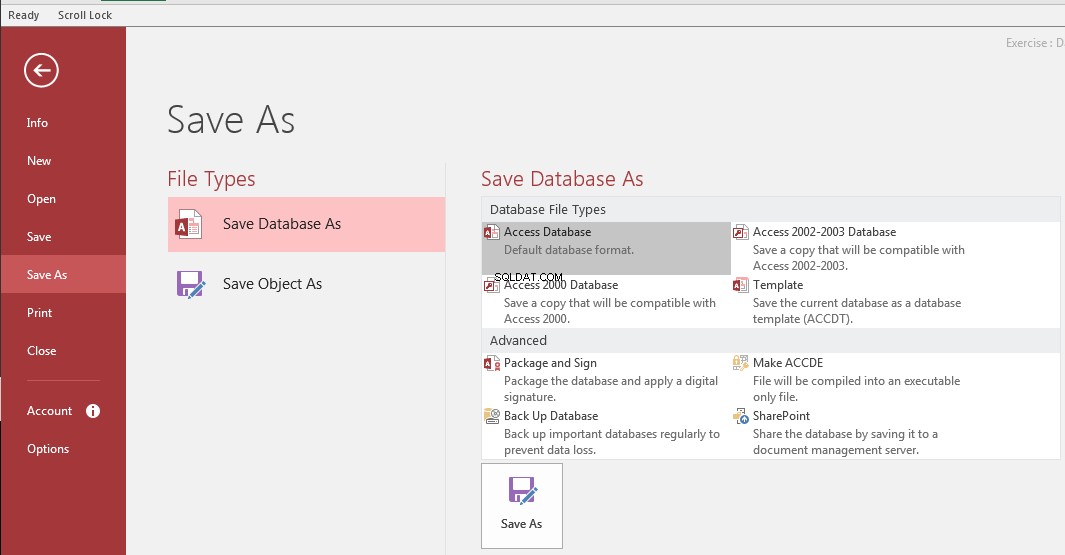
In dit venster kunt u het type formaat selecteren dat de nieuwe database moet hebben. Het venster biedt acht opties die u kunt gebruiken. Om een optie te gebruiken, klikt u erop en klikt u op Opslaan als of dubbelklikt u erop.
Als u de database in de huidige Access 2007-2016-indeling wilt opslaan, selecteert u Access Database. Dit zou het dialoogvenster Opslaan als openen. Geef de naam en locatie van de nieuwe database op en klik op Opslaan.
Als u een Microsoft Access 97-2000-database wilt maken, klikt u op Access 2000-database. Dit zou een bestand maken met .mdb verlenging. Dit zijn databases die compatibel zijn met Microsoft Access 97 en Microsoft Office Access 2000. Er is niets slecht of mis met die versies van databases en ze zijn nog steeds waardevol vandaag. Ze ondersteunen gewoon niet sommige functies zoals uitdrukkingen, bijlagen, enz. op een tabel:
In de MDB-databaseversies kunnen geen expressies op tabellen worden gemaakt, maar wel op andere typen objecten.
Microsoft Access en Spreadsheets
Een werkblad importeren
Er zijn verschillende manieren waarop u een spreadsheet in een Microsoft Access-database kunt importeren. De spreadsheet kan uit elke applicatie komen, inclusief Microsoft Excel, Google Spreadsheets, CSV, enz.
Als u van plan bent een Microsoft Excel-werkblad of een Google-spreadsheet te importeren, moet u dit eerst voorbereiden. Een manier is om ervoor te zorgen dat de hele spreadsheet als één tabel is georganiseerd. In dit geval moet de bovenkant van de spreadsheet de categorieën bevatten die kunnen worden gebruikt/beschouwd als kolomkoppen. Er mag geen niet-georganiseerde tekst (tekst die niet wordt beschouwd als behorend tot de tabel) boven de koppen worden weergegeven. De waarden kunnen dan onder elke kop worden weergegeven. Hier is een voorbeeld:
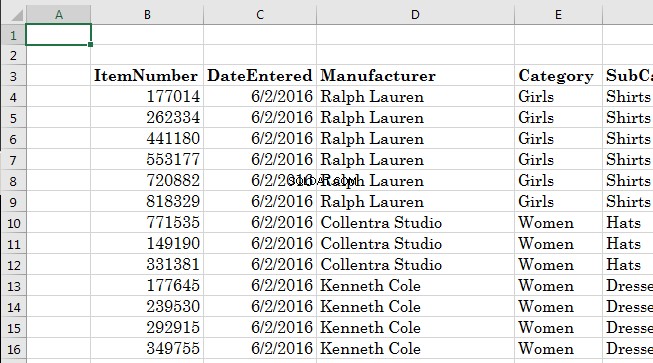
Er mag geen niet-georganiseerde tekst (tekst die niet wordt beschouwd als behorend tot de tabel) onder de records worden weergegeven.
Als het document klaar is, om het te importeren:
- Als het navigatiedeelvenster ten minste één tabel bevat, klikt u met de rechtermuisknop op een tabel in het navigatiedeelvenster, plaatst u de muis op Importeren en klikt u op Excel
- Klik in het gedeelte Importeren en koppelen van het lint op de Excel-knop

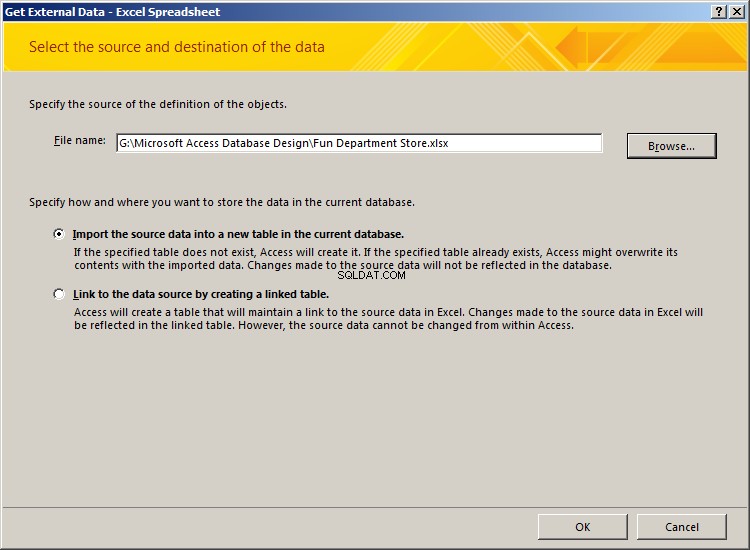
Geef in het dialoogvenster het pad en de naam van het werkblad op en klik op OK. Dit zou een tovenaar starten. Selecteer op de eerste pagina de naam van de spreadsheet die de gegevens bevat.
Praktisch leren:een Microsoft Excel-spreadsheet importeren
- Klik op het lint op Bestand en klik op Openen
- Klik in de lijst met bestanden op FunDS2
- Klik op het lint op Externe gegevens
- Klik in het gedeelte Importeren en koppelen op de Excel-knop
- Klik op de knop Bladeren
- Selecteer uit de bronnen die bij deze lessen horen, Fun Department Store en klik op Openen
- Klik op OK
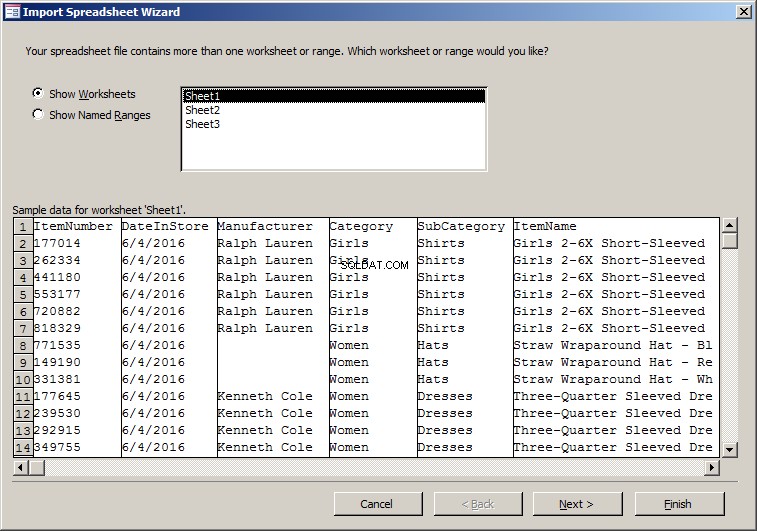
- Controleer op de eerste pagina van de wizard of Blad1 is geselecteerd en klik op Volgende. Er kan een berichtvenster worden weergegeven. Lees het en klik op OK

- Controleer op de tweede pagina van de wizard of Eerste rij bevat kolomkoppen is aangevinkt en klik op Volgende
- Klik op de derde pagina van de wizard, terwijl de kolom ItemNumber is geselecteerd, op de pijl van de keuzelijst Gegevenstype en selecteer Lang geheel getal
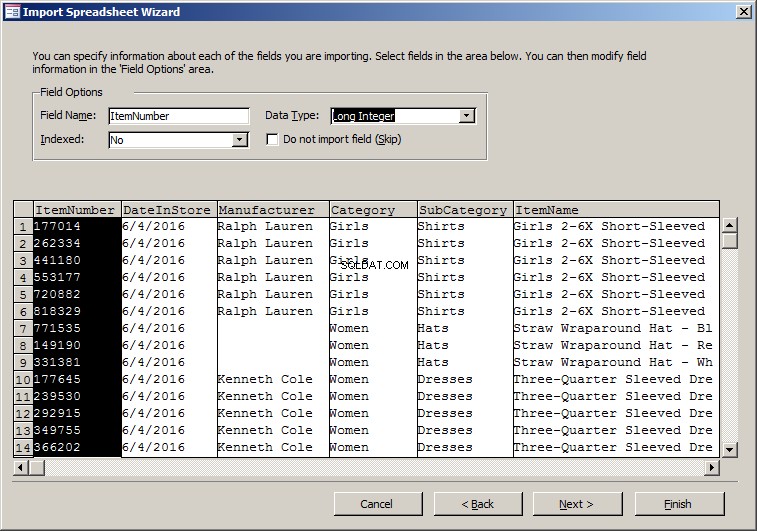
- Klik op DateInStore of een cel eronder en zorg ervoor dat het gegevenstype Datum met tijd is
- Klik op Prijs per eenheid en zorg ervoor dat het gegevenstype is ingesteld op Dubbel
- Klik op Volgende
- Klik op de pijl van de keuzelijst en selecteer Artikelnummer
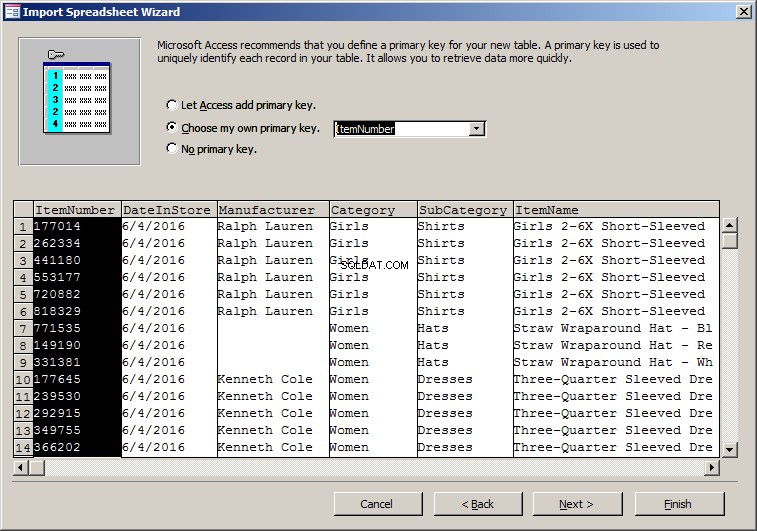
- Klik op Volgende
- Vervang de naam Importeren naar tabel in StoreItems
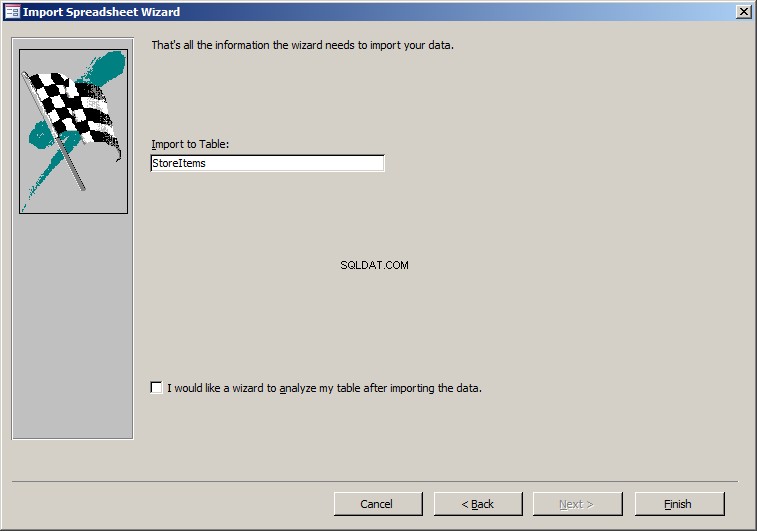
- Klik op Voltooien
- Klik in het dialoogvenster op Sluiten
- Klik in het navigatiedeelvenster met de rechtermuisknop op de tabel StoreItems en klik op Ontwerpweergave
- Wijzig de volgende kenmerken van de velden:
Veldnaam Veldgrootte Formaat Bijschrift Artikelnummer Artikel # DateInStore Datum in winkel Fabrikant 40 Categorie 25 Subcategorie 25 Subcategorie ItemName 100 Artikelnaam Artikelmaat 20 Maat Eenheidsprijs Dubbel Vast Eenheidsprijs - Sluit de tafel
- Als u wordt gevraagd of u wilt opslaan, klikt u op Ja
- Je ontvangt ook een berichtvenster waarin staat dat er gegevens verloren kunnen gaan. Lees het en klik op Ja
Een benoemde spreadsheet importeren
Als de spreadsheet een mix van georganiseerde en niet-georganiseerde secties of groepen bevat, moet u namen maken voor de benodigde groepen records.
Praktisch leren:een Microsoft Excel-spreadsheet importeren
- Microsoft Excel starten
- Open uit de bronnen die bij deze lessen horen, het Fun Department Store-werkboek
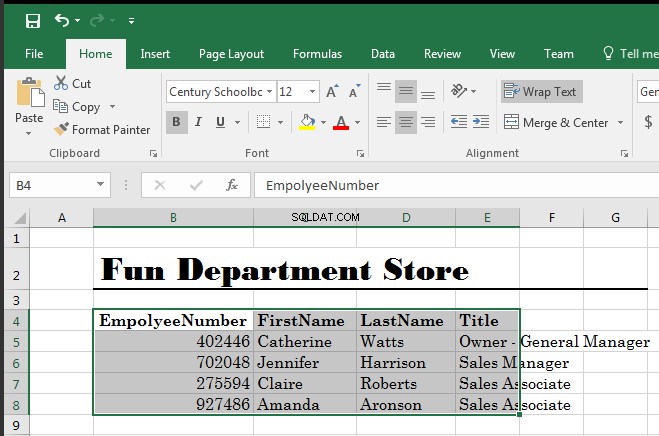
- Klik onderaan op Blad2
- Klik op Medewerker # en typ EmpolyeeNumber
- Vervang voornaam door Voornaam
- Vervang voornaam door Achternaam
- Selecteer de cellen van Werknemersnummer tot de laatste Verkoopmedewerkers
- Klik op het lint op Formules
- Klik in het gedeelte Gedefinieerde namen op Naam definiëren
- Vervang de voorgestelde naam door Werknemers
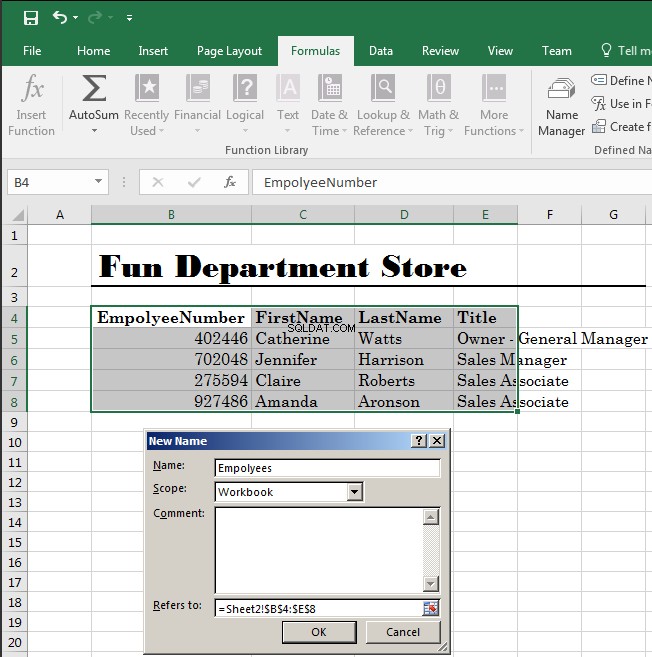
- Klik op OK
- Microsoft Excel sluiten
- Wanneer u wordt gevraagd of u wilt opslaan, klikt u op Opslaan en keert u terug naar Microsoft Access
- Klik op het lint indien nodig op Externe gegevens.
Klik in het gedeelte Importeren en koppelen op de Excel-knop - Klik op de knop Bladeren
- Selecteer de Fun Department Store-spreadsheet die je hierboven hebt gewijzigd en klik op Openen
- Klik in het dialoogvenster Externe gegevens ophalen op OK
- Klik op de eerste pagina van de wizard op het keuzerondje Show Named Ranges
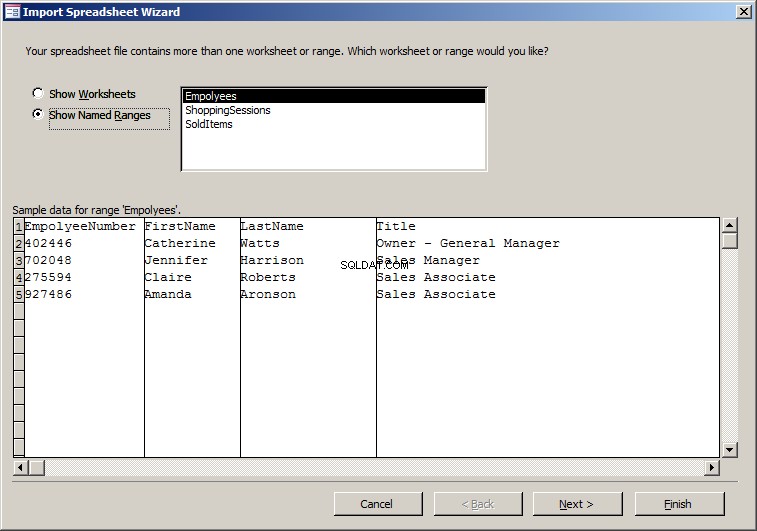
- Zorg ervoor dat Medewerkers is geselecteerd en klik op Volgende
- Klik op de tweede pagina van de wizard op Eerste rij met kolomkoppen en klik op Volgende
- Klik op de derde pagina van de wizard, terwijl de kolom Werknemersnummer is geselecteerd, op de pijl van de keuzelijst Gegevenstype en selecteer Lang geheel getal
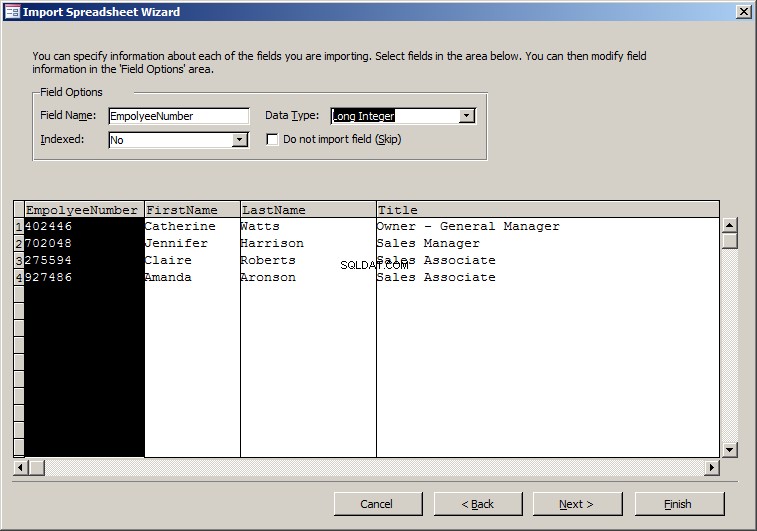
- Klik op Volgende
- Klik op de pijl van de keuzelijst en selecteer Werknemernummer

- Klik op Volgende
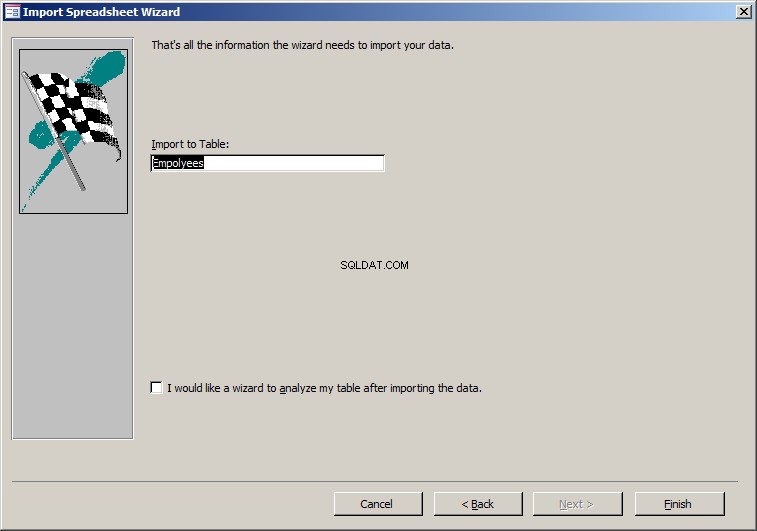
- Accepteer de naam van de tabel als Werknemers en klik op Voltooien
- Klik in het dialoogvenster op Sluiten
- Klik in het navigatiedeelvenster met de rechtermuisknop op de tabel Werknemers en klik op Ontwerpweergave
- Wijzig de volgende kenmerken van de velden:
Veldnaam Gegevenstype Veldgrootte Expressie Bijschrift Werknemersnummer Nummer Werknemer # Voornaam 20 Voornaam Achternaam 20 Achternaam MedewerkerNaam [Voornaam] &" " &[Achternaam] Naam werknemer Titel 100 - Sluit de tafel
- Als u wordt gevraagd of u wilt opslaan, klikt u op Ja
- U ontvangt ook een berichtvenster waarin staat dat sommige gegevens verloren kunnen gaan. Lees het en klik op Ja
Kopiëren van een spreadsheet
In plaats van handmatig een spreadsheet te importeren, kunt u de waarden in een spreadsheet selecteren, kopiëren en in een tabel in Microsoft Access plakken.
Praktisch leren:kopiëren van een spreadsheet
- Start Microsoft Excel en klik in de lijst met bestanden op Fun Department Store
- Klik op Blad3
- Klik op cel B5
- Houd Shift ingedrukt
- Klik op cel G64
- Verschuiving loslaten
- Klik op het lint van Microsoft Excel op Home
- Klik in het gedeelte Klembord op Kopiëren
- Dubbelklik in Microsoft Access in het navigatiedeelvenster op de tabel ShoppingSessions
- Klik met de rechtermuisknop op de knop op het snijpunt van de kolomkoppen en de rijkoppen
- Klik op Plakken
- Lees het Microsoft Access-berichtvenster en klik op Ja
- Terug naar Microsoft Excel in Blad3
- Klik op cel I5
- Houd Shift ingedrukt
- Klik op cel P165
- Verschuiving loslaten
- Klik op het lint op Start en klik op Kopiëren
- Ga terug naar Microsoft Access en dubbelklik op de tabel SoldItems in het navigatiedeelvenster
- Klik op de tafel op Bon #
- Houd Shift ingedrukt
- Klik op eenheidsprijs
- Verschuiving loslaten
- Druk op Ctrl + V om te plakken
- Lees het berichtvenster en klik op Ja
- Beide tabellen sluiten
- Klik in het navigatiedeelvenster met de rechtermuisknop op een van de tabellen, plaats de muis op Importeren en klik op Access Database
- Klik op Bladeren
- Zoek en selecteer de FunDS1-database uit de vorige lessen (anders, uit de bronnen die bij deze lessen horen, selecteer FunDS2) en klik op Openen
- Klik in het dialoogvenster op OK
- Klik in het dialoogvenster Objecten importeren op Formulieren
- Klik op Alles selecteren
- Klik op OK
- Als de formulieren zijn geïmporteerd, klikt u in het dialoogvenster op Sluiten
Exporteren naar een Microsoft Excel-spreadsheet
om gegevens van Microsoft Access naar een spreadsheet over te brengen, moet u kopiëren en plakken. Om te beginnen kunt u in Microsoft Access een tabel openen in de gegevensbladweergave en vervolgens een, enkele of alle records selecteren. Nadat u de record(s) hebt geselecteerd, kunt u deze kopiëren, Microsoft Excel openen, op de cel klikken die de waarde linksboven zou bevatten en plakken.
Een andere techniek bestaat uit exporteren, en u kunt dit doen zonder eerst de tabel te openen:
- Klik voordat u een tabel exporteert in het navigatiedeelvenster op de tabel. Klik vervolgens op het lint op Externe gegevens. Klik in het gedeelte Exporteren op de Excel-knop
- Klik in het navigatiedeelvenster met de rechtermuisknop op de gewenste tabel, plaats de muis op Exporteren en klik op Excel
Dit zou het dialoogvenster Exporteren - Excel-spreadsheet openen met het pad waar het bestand zal worden opgeslagen. De standaardmap is Mijn documenten:

Praktisch leren:gegevens exporteren als een spreadsheet
- Klik op het lint op Bestand en klik op Openen
- Klik in de lijst met bestanden op Computer Training Center
- Klik in het navigatiedeelvenster met de rechtermuisknop op de tabel Cursusschema's, plaats de muis op Exporteren en klik op Excel
- Klik op de knop Bladeren en selecteer de map (Mijn) Documenten
- Klik op OK
- Klik in het dialoogvenster op Sluiten
Microsoft Access en tekstbestanden
Een tekstbestand importeren
U kunt een tabel maken met gegevens uit een tekstbestand. Als u het (tekst)bestand in Kladblok aanmaakt, wordt de afbakening van een veld meestal gedaan door op Tab te drukken nadat u de inhoud van de velden hebt gemaakt. Een tekstbestand importeren in Microsoft Access:
- Klik in het gedeelte Importeren van het lint op de knop Tekstbestand
- Als u eerder een tabel had gemaakt die de waarden zou ontvangen, klikt u in het navigatiedeelvenster met de rechtermuisknop op die tabel, plaatst u de muis op Importeren en klikt u op Short Text File
Praktisch leren:een tekstdocument importeren
- Om een nieuwe database te starten, klikt u op het lint op Bestand en vervolgens op Nieuw
- Klik op lege desktopdatabase
- Stel de naam in op Monson University1
- Klik op Maken
- Klik op het lint op Bestand en klik op Opties
- Klik in de linkerlijst op Huidige database
- Klik in de rechterlijst op Overlappende Windows
- Klik op OK
- Klik op het lint op Externe gegevens en klik in het gedeelte Importeren en koppelen op Tekstbestand

- Klik in het dialoogvenster Externe gegevens ophalen - Tekstbestand op de knop Bladeren
- Zoek de bronnen die bij deze lessen horen en selecteer het bestand Departments.txt
- Klik op Openen
- Klik in het dialoogvenster op OK
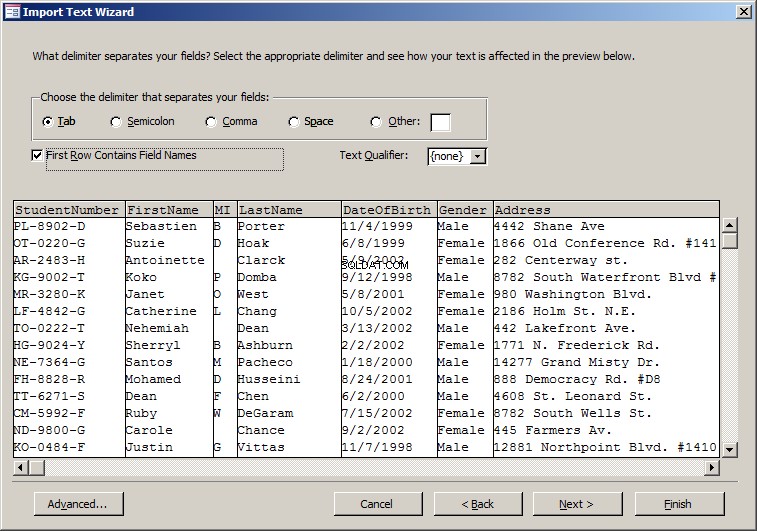
- Accepteer op de eerste pagina van de wizard Tekst importeren dat de tekst moet worden gescheiden en klik op Volgende
- Accepteer op de tweede pagina dat het scheidingsteken is ingesteld op Tab.
Klik op het selectievakje Eerste rij bevat veldnamen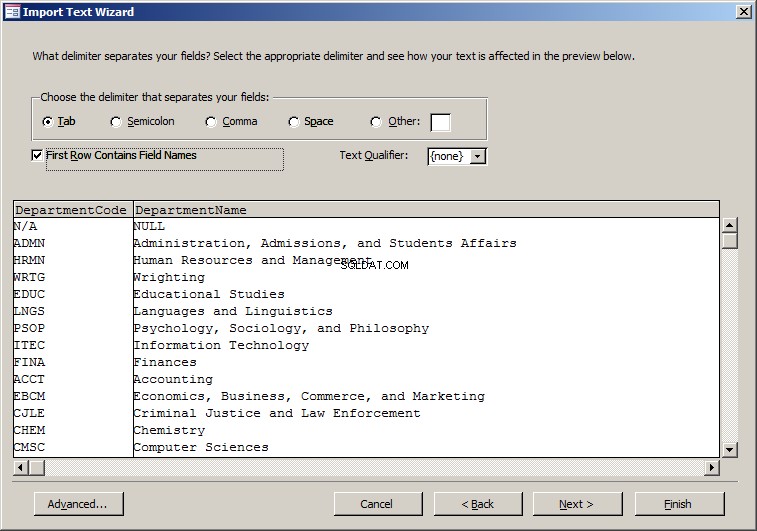
- Klik op Volgende
- Klik op de derde pagina van de wizard op Volgende
- Klik op de pijl van de combobox en selecteer DepartmentCode
- Klik op Volgende
- Accepteer de naam van de tabel als Afdelingen en klik op Voltooien
- Als de records zijn geïmporteerd, klikt u op Sluiten
- Klik in het navigatiedeelvenster met de rechtermuisknop op de tabel Afdelingen en klik op Ontwerpweergave
- Wijzig de volgende kenmerken van de velden:
Veldnaam Veldgrootte Afdelingscode 5 Afdelingsnaam 100 - Sluit de tafel
- Als u wordt gevraagd of u wilt opslaan, klikt u op Ja
- U ontvangt ook een berichtvenster waarin staat dat sommige gegevens verloren kunnen gaan. Lees het en klik op Ja
- Klik op het lint op Externe gegevens en klik in het gedeelte Importeren en koppelen op Tekstbestand
- Klik in het dialoogvenster Externe gegevens ophalen - Tekstbestand op de knop Bladeren
- Selecteer uit de bronnen die bij deze lessen horen het bestand Employees.txt en klik op Openen
- Klik in het dialoogvenster op OK
- Accepteer op de eerste pagina van de wizard Tekst importeren dat de tekst moet worden gescheiden en klik op Volgende
- Accepteer op de tweede pagina dat het scheidingsteken is ingesteld op Tab en klik op Eerste rij Bevat veldnamen
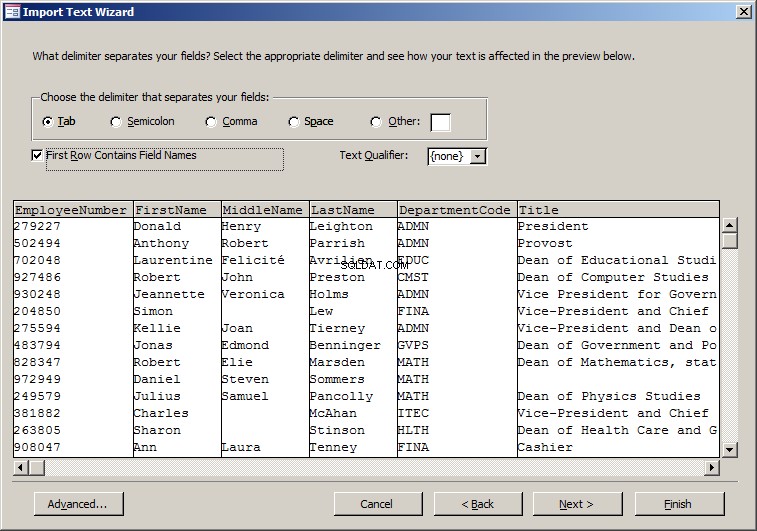
- Klik op Volgende
- Klik op de derde pagina van de wizard, terwijl Werknemersnummer is geselecteerd, op de pijl van de keuzelijst Gegevenstype en selecteer Korte tekst
- Klik op Volgende
- Klik op de pijl van de keuzelijst en selecteer Werknemernummer
- Klik op Volgende
- Accepteer de naam van de tabel als Werknemers en klik op Voltooien
- Als de records zijn geïmporteerd, klikt u op Sluiten
- Klik in het navigatiedeelvenster met de rechtermuisknop op de tabel Werknemers en klik op Ontwerpweergave
- Wijzig de volgende kenmerken van de velden:
Veldnaam Veldgrootte Bijschrift Werknemersnummer 10 Voornaam 25 Voornaam MiddleName 25 Achternaam 25 Achternaam Afdelingscode 5 Titel 100 - Sluit de tafel
- Als u wordt gevraagd of u wilt opslaan, klikt u op Ja
- U ontvangt ook een berichtvenster waarin staat dat sommige gegevens verloren kunnen gaan. Lees het en klik op Ja
- Klik op het lint op Externe gegevens en klik in het gedeelte Importeren en koppelen op Tekstbestand
- Klik in het dialoogvenster Externe gegevens ophalen - Tekstbestand op de knop Bladeren
- Selecteer uit de bronnen die bij deze lessen horen het bestand Majors.txt en klik op Openen
- Klik in het dialoogvenster op OK
- Accepteer op de eerste pagina van de wizard Tekst importeren dat de tekst moet worden gescheiden en klik op Volgende
- Accepteer op de tweede pagina dat het scheidingsteken is ingesteld op Tab en klik op Eerste rij Bevat veldnamen
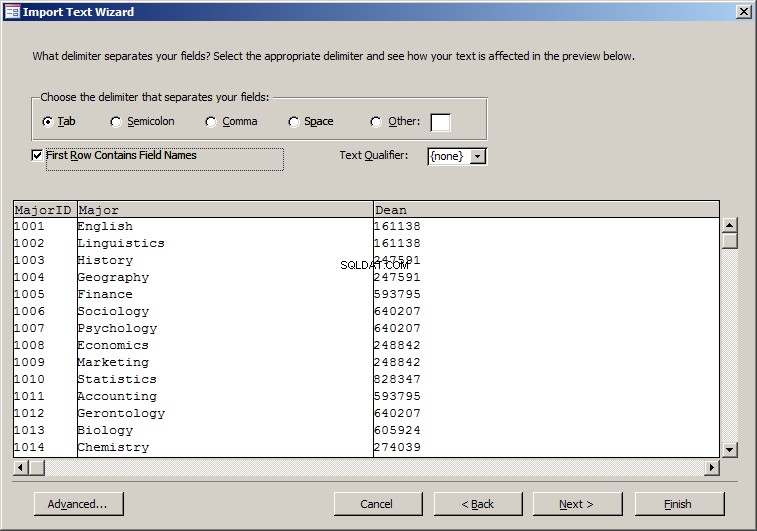
- Klik op Volgende
- Klik op de derde pagina van de wizard op Dean
- Klik op de pijl van de keuzelijst Gegevenstype en selecteer Korte tekst
- Klik op Volgende
- Klik op de pijl van de combobox en selecteer MajorID
- Klik op Volgende
- Accepteer de naam van de tabel als Majors en klik op Voltooien
- Als de records zijn geïmporteerd, klikt u op Sluiten
- Klik in het navigatiedeelvenster met de rechtermuisknop op de tabel Werknemers en klik op Ontwerpweergave
- Wijzig de volgende kenmerken van de velden:
Veldnaam Veldgrootte MajorID Major 100 Decaan 10 - Sluit de tafel
- Als u wordt gevraagd of u wilt opslaan, klikt u op Ja
- U ontvangt ook een berichtvenster waarin staat dat sommige gegevens verloren kunnen gaan. Lees het en klik op Ja
- Klik op het lint op Externe gegevens en klik in het gedeelte Importeren en koppelen op Tekstbestand
- Klik in het dialoogvenster Externe gegevens ophalen - Tekstbestand op de knop Bladeren
- Selecteer uit de bronnen die bij deze lessen horen het bestand Minors.txt en klik op Openen
- Klik in het dialoogvenster op OK
- Accepteer op de eerste pagina van de wizard Tekst importeren dat de tekst moet worden gescheiden en klik op Volgende
- Accepteer op de tweede pagina dat het scheidingsteken is ingesteld op Tab en klik op Eerste rij Bevat veldnamen
- Klik op Volgende
- Klik op de derde pagina van de wizard op Volgende
- Klik op de pijl van de keuzelijst en selecteer MinorID
- Klik op Volgende
- Accepteer de naam van de tafel als Minderjarigen en klik op Voltooien
- Als de records zijn geïmporteerd, klikt u op Sluiten
- Klik in het navigatiedeelvenster met de rechtermuisknop op de tabel Werknemers en klik op Ontwerpweergave
- Wijzig de volgende kenmerken van de velden:
Veldnaam Veldgrootte MinrID Minor 100 - Sluit de tafel
- Als u wordt gevraagd of u wilt opslaan, klikt u op Ja
- U ontvangt ook een berichtvenster waarin staat dat sommige gegevens verloren kunnen gaan. Lees het en klik op Ja
- Klik in het navigatiedeelvenster met de rechtermuisknop op Tabel1, plaats de muis op Importeren en klik op Tekstbestand
- Klik in het dialoogvenster Externe gegevens ophalen - Tekstbestand op de knop Bladeren
- Zoek de bronnen die bij deze lessen horen en selecteer het bestand Students.txt
- Klik op Openen
- Klik in het dialoogvenster op OK
- Accepteer op de eerste pagina van de wizard Tekst importeren dat de tekst moet worden gescheiden en klik op Volgende
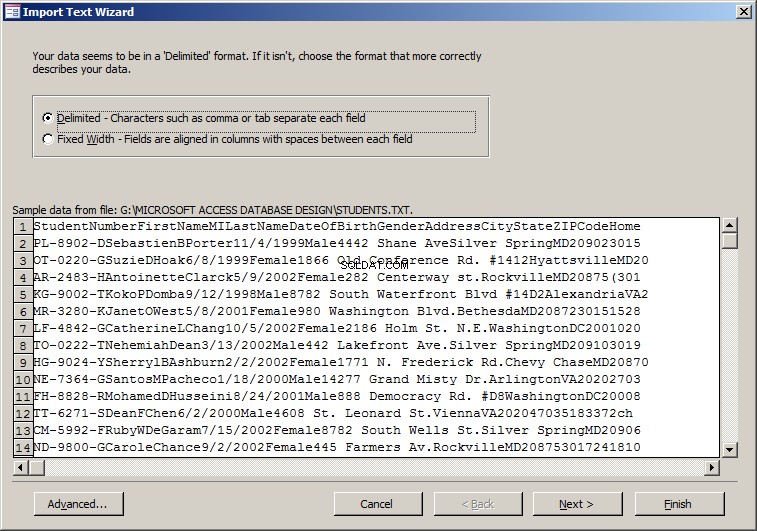
- Accepteer op de tweede pagina dat het scheidingsteken is ingesteld op Komma of Tab en klik op Volgende
- Klik op de tweede pagina van de wizard op Eerste rij Bevat veldnamen
- Klik op Volgende
- Als StudentNumber is geselecteerd, klikt u op de pijl van de keuzelijst Gegevenstype en selecteert u Korte tekst
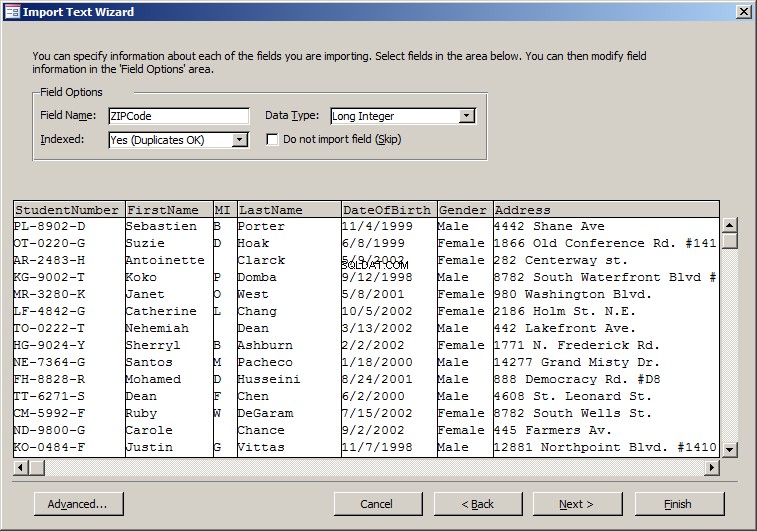
- Klik op Volgende
- Klik op de pijl van de combobox en selecteer StudentNumber
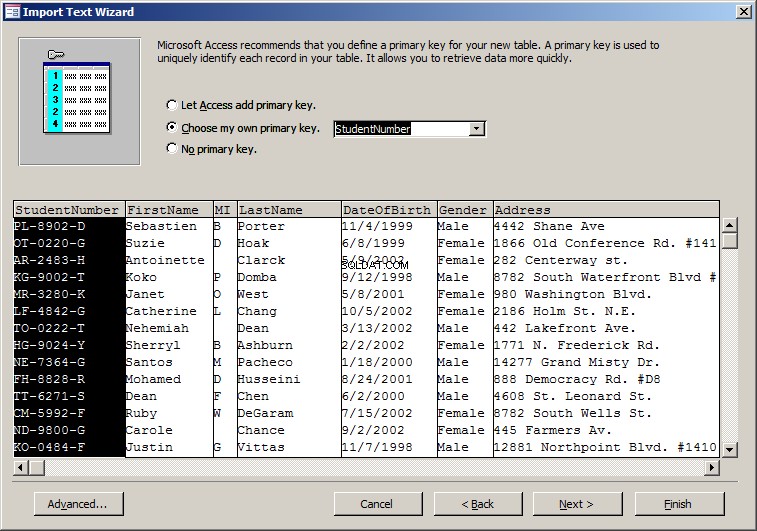
- Klik op Volgende
- Accepteer de naam van de tabel als Leerlingen en klik op Voltooien
- Als de records zijn geïmporteerd, klikt u op Sluiten
- Klik in het navigatiedeelvenster met de rechtermuisknop op de tabel Studenten en klik op Ontwerpweergave
- Wijzig de volgende kenmerken van de velden:
Veldnaam Veldgrootte Bijschrift Studentnummer 12 Leerling # Voornaam 25 Voornaam MiddleName 25 Achternaam 25 Achternaam DateOfBirth Geslacht 20 Adres 120 Stad 40 Geef 50 op Postcode 20 ZIP-code - Sluit de tafel
- Als u wordt gevraagd of u wilt opslaan, klikt u op Ja
- U ontvangt ook een berichtvenster waarin staat dat sommige gegevens verloren kunnen gaan. Lees het en klik op Ja
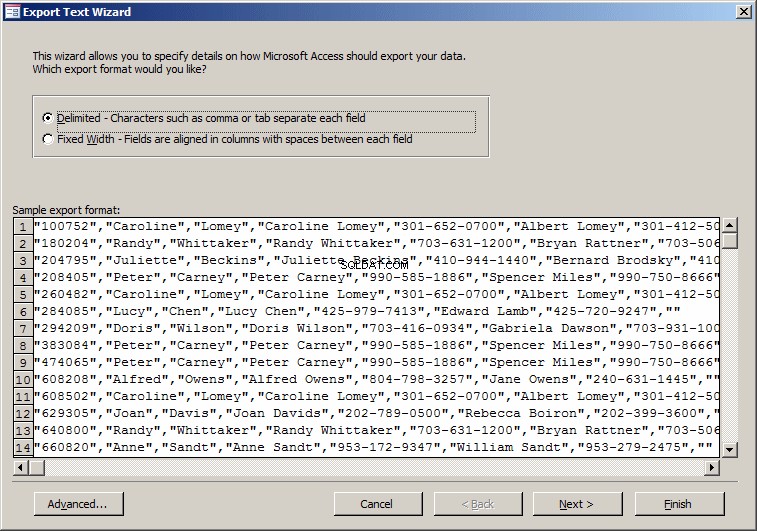
Een tekstbestand exporteren
Om een tabel als tekst op te slaan:
- Klik in het navigatiedeelvenster op de tabel die u wilt exporteren. Klik in het gedeelte Exporteren van het lint op de knop Tekstbestand
- Klik in het navigatiedeelvenster met de rechtermuisknop op de tabel die de gegevens bevat, plaats de muis op Exporteren en klik op Short Text File
Dit zou het dialoogvenster Exporteren - Tekstbestand openen met de naam van het bestand met de extensie .txt. Volg gewoon de wizard:
Microsoft Access and XML
Importing an XML File
An XML file is essentially a document made of at least one table. A typical XML file starts with a root node:
<?xml version="1.0" standalone="yes"?>
Under it, the global parent node starts and closes itself:
<?xml version="1.0" standalone="yes"?>
<FunFurniture>
</FunFurniture>
This global parent node is not the table. Inside that node, you should have a node that would represent a table and it can repeat itself as many times as necessary. Hier is een voorbeeld:
<?xml version="1.0" standalone="yes"?>
<FunFurniture>
  <Employees>
  </Employees>
  <Employees>
  </Employees>
</FunFurniture>
Inside each table, you should have the name of each column followed by its value:
<?xml version="1.0" standalone="yes"?>
<FunFurniture>
  <Employees>
    <EmployeeNumber>924795</EmployeeNumber>
    <FirstName>Donald</FirstName>
    <LastName>Tripleton</LastName>
    <Title>Sales Manager</Title>
  </Employees>
  <Employees>
    <EmployeeNumber>274957</EmployeeNumber>
    <FirstName>Jeanne</FirstName>
    <LastName>Wooley</LastName>
    <Title>Sales Associate</Title>
  </Employees>
  <Employees>
    <EmployeeNumber>684078</EmployeeNumber>
    <FirstName>Irene</FirstName>
    <LastName>Polsen</LastName>
    <Title>Sales Associate</Title>
  </Employees>
  <Employees>
    <EmployeeNumber>297149</EmployeeNumber>
    <FirstName>Monica</FirstName>
    <LastName>Jackson</LastName>
    <Title>Sales Associate</Title>
  </Employees>
</FunFurniture>
After creating and saving an XML file, to import it in Microsoft Access, in the External Data tab of the Ribbon and in the Import section, click the XML File button  and follow the wizard.
Practical Learning:Importing an XML Document
- To start a new database, on the Ribbon, click File and click New
- Click Blank Desktop Database
- Set the name to StatesStatistics2
- Click Create
- Close the default table without saving it
- On the Ribbon, click External Data
- In the Import &Link section, click the XML File button
- In the Get External Data - XML File dialog box, click the Browse button
- Locate the resources that accompany these lessons and select the StatesStatistics.xml file
- Click Open
- On the Get External Data - XML File dialog box, click OK
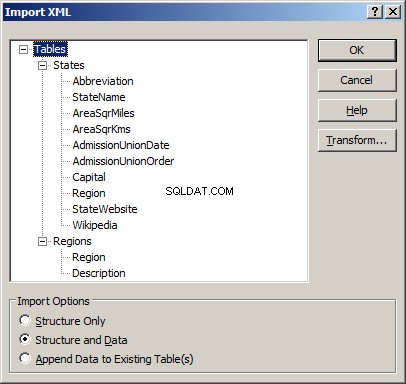
- In the Import XML dialog box, accept the selections and click OK
- In the Get External Data - XML File dialog box, click the Close button
- In the Navigation Pane, right-click the Regions table and click Design View
- In the top side of the window, make sure Region is selected.
In the bottom side, set the Field Size to 25 - Close the table
- When asked whether you want to save, click Yes
- You will also receive a message box that some data may be lost. Read it and click Yes
- In the Navigation Pane, double-click the States table
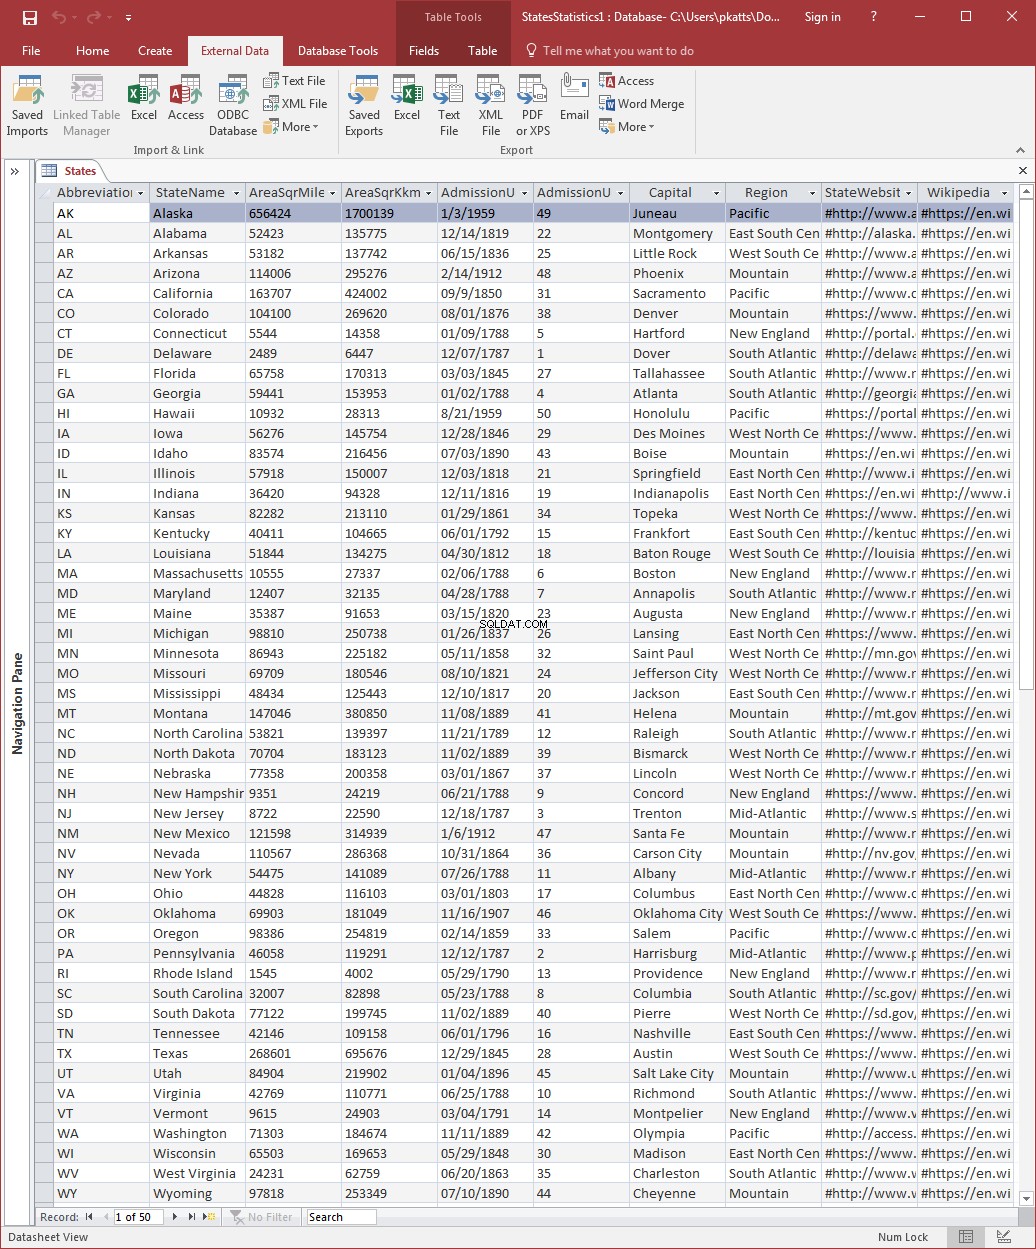
- After viewing the records, right-click the States tab and click Design View
- Change the following characteristics of the fields:
Field Name Data Type Field Size Format Decimal Places Caption Abbreviation 2 State StateName 40 Name AreaSqrMiles Number Standard 0 Sqr Miles AreaSqrKm Number Standard 0 Sqr Kms AdmissionUnionDate Date/Time Date of Admission to Union AdmissionUnionOrder Number Byte Order of Admission to Union Capital 40 Region 25 StateWebsite Hyperlink State's Website Wikipedia Hyperlink - Close the table
- When asked whether you want to save, click Yes
- You will also receive a message box that some data may be lost. Read it and click Yes
Exporting to XML
To export a table to XML format, in the Navigation Pane:
- Right-click the table that holds the data, position the mouse on Export, and click XML File
- Click the table you want to export. On the Ribbon, click External Data and, in the Export section, click More -> XML File
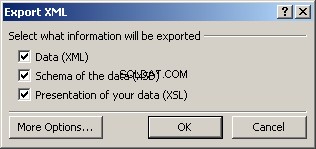
The Export - XML File dialog box that comes up allows you to verify the name of the file that will be created and the path where it will go. Once you are ready, you can click OK. A dialog box would come up asking which one(s) of the three files you want to have created:
If you want to create a more elaborate XML application with advanced options, you can click the More Options button. This would close the previous dialog box and open another one:
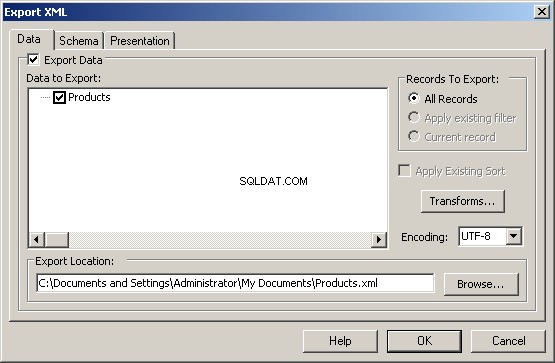
This dialog box allows you to specify more details on how the table should be exported. After making your selections, click OK.
Microsoft Access and the Web
Importing an HTML File
To import an HTML file in Microsoft Access:
- In the Import section of the Ribbon, click the More button and click HTML Document
- If the Navigation Pane contains at least one table, right-click a table, position the mouse on Import, and click HTML Document
The primary steps to follow are the same for a text document. In the third page of the wizard, to consider and/or apply more options, click the Advanced button:
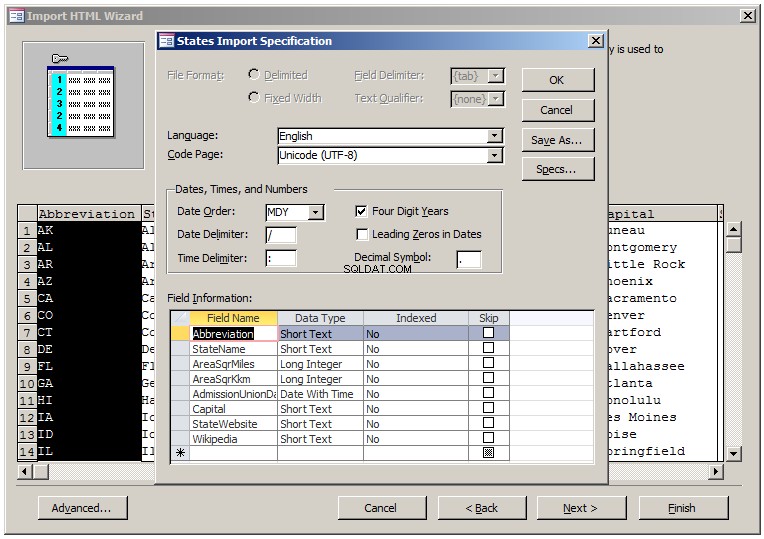
After making the necessary adjustments, click OK.
Practical Learning:Importing a Text Document
- On the Ribbon, click File and click New
- Click Blank Desktop Database
- Set the name to States Statistics
- Click Create
- In the Navigation Pane, right-click Table1, position the mouse on Import, and click HTML Document
- In the Get External Data - HTML Document dialog box, click the Browse button
- Locate the resources that accompany these lessons
- Select the states.htm document and click Open
- Click OK
- In the first page of the Import HTML Wizard, click First Row Contains Column Headings
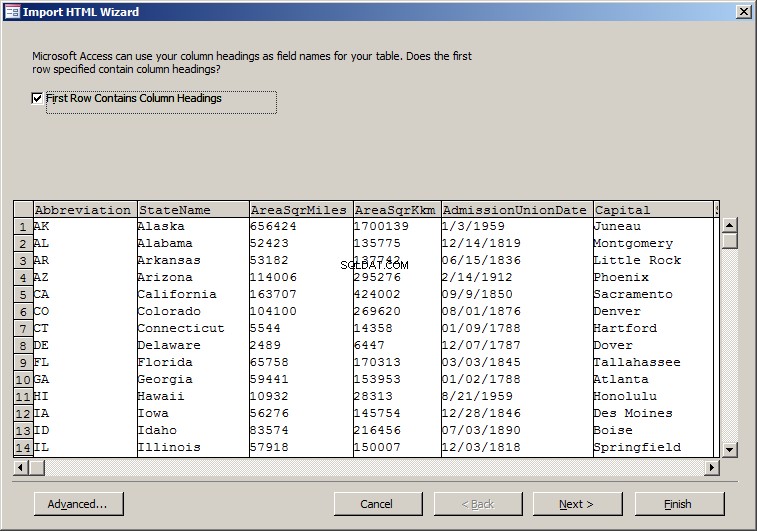
- Click Next
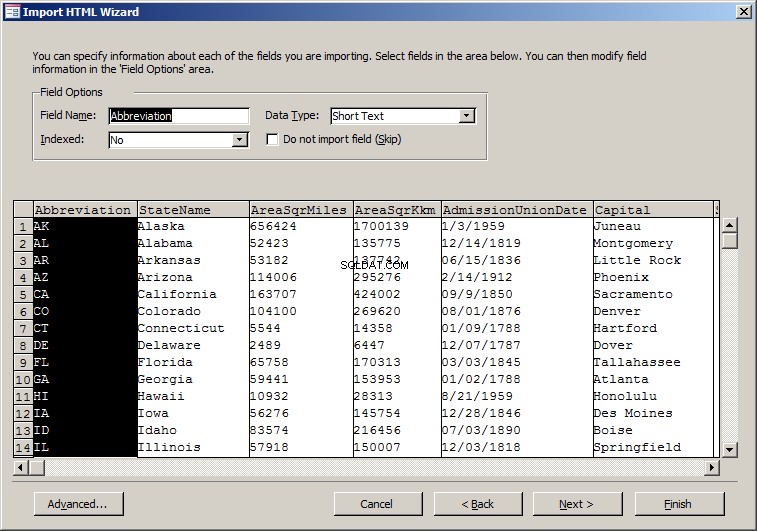
- Accept the defaults of the second page of the wizard and click Next
- In the third page of the wizard, click the arrow of the combo box and select Abbreviation
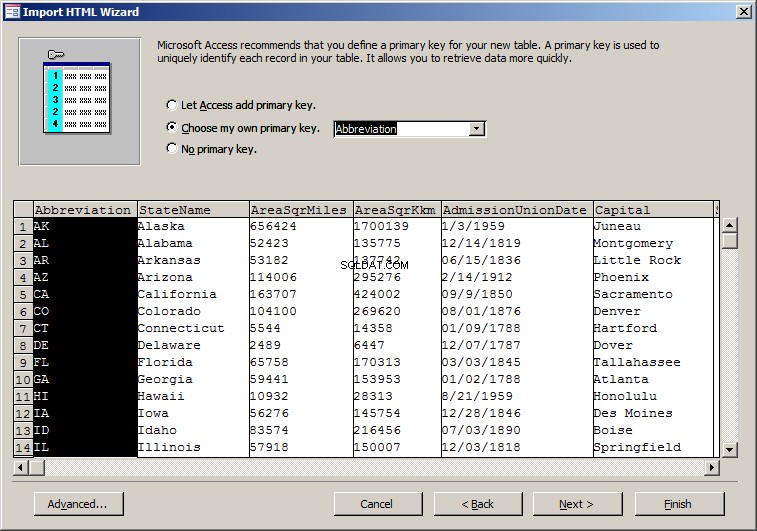
- Click Next
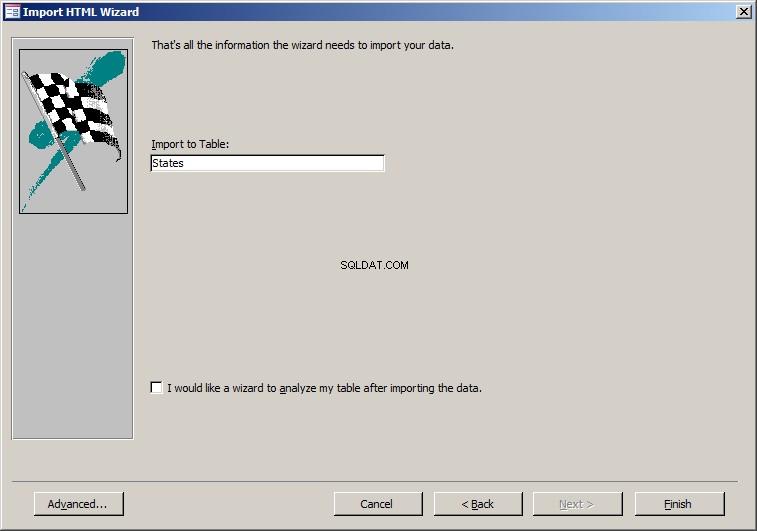
- Set the name of the table as States
- Click Finish
- You receive a confirmation message. Click Close
- In the Navigation Pane, right-click the States table and click Design View
- Change the following characteristics of the fields:
Field Name Data Type Field Size Format Caption Abbreviation 5 Abbrv StateName 40 State Name AreaSqrMiles Number Double Standard Area in Square Miles AreaSqrKkm Number Double Standard Area in Square Kilometers AdmissionUnionDate Date of Admission to Union Capital 40 StateWebsite Hyperlink State's Website Wikipedia Hyperlink - Close the table
- When asked whether you want to save, click Yes
- You will also receive a message box that some data may be lost. Read it and click Yes
- Close Microsoft Access
A Microsoft Access Table on a Web Page
You can copy and paste Data from a webpage into a table. To do this:
- If you want to copy all columns and all records, in the Navigation Pane of Microsoft Access, right-click the table and click Copy
- If you want to copy all columns and all records, open the table in Microsoft Access, press Ctrl + A to select everything. Press Ctrl + C to copy. In the web page of the application, click the section you want on the web page and press Ctrl + V to paste
- If you want to copy only some columns and/or some records, open the table in Microsoft Access. Make the selection. Right-click the selection and click Copy. In the web application, right-click the section you want on the web page and click Paste or click the section and press Ctrl + V
Some other applications do not support copy and paste. An alternative is to export the table to HTML. To save a table as HTML, in the Navigation Pane:
- Right-click the table that holds the data, position the mouse on Export, and click HTML Document
- Click the table you want to export. On the Ribbon, click External Data and, in the Export section, click More -> HTML Document
This would open the Export - HTML Document dialog box.
Microsoft Access and Microsoft Word
Introduction
There are various ways you can use Microsoft Word with a Microsoft Access database. As opposed to copying from a database table and pasting to a table, you may want the reverse. That is, you can copy a table from a Microsoft Word document. To do this, in Microsoft Word, select the table in a document and copy it. Start a table in Microsoft Access and paste the records.
Mail Merge
Mail merging allows you to use data on your database to create letters, labels, envelopes, and other documents that require external data originating from another document. To start a mail merge, in the Navigation Pane:
- Click the table that holds the information you want to use. In the Export section of the Ribbon, click Word Merge
- Right-click the table, position the mouse on Export and click Word Merge
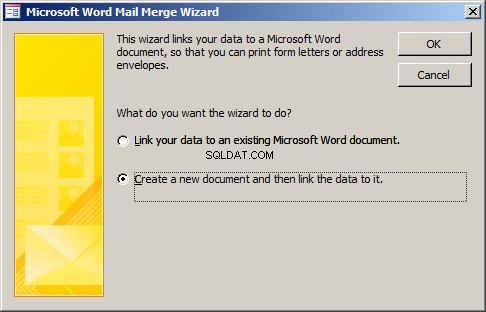
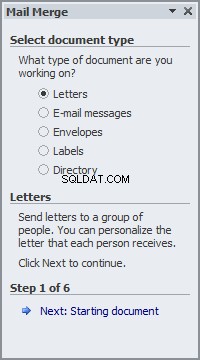
This would open the Microsoft Word Mail Merge Wizard:

And click OK. This would open the Select Microsoft Word Document dialog box. It allows you to select the letter/document you plan to use. If you don't have that document, click Cancel, open Microsoft Word, create the document and proceed from there. If you have a letter, select it. This would open the letter in Microsoft Word. ail Merge window, if you want to create a letter to be sent out, accept the Letters radio button and click Next. In the second page of the wizard, you will have the choice of creating a new Microsoft Word document or using an existing document. If you want to create a new document, click or accept Use the Current Document. If you click Start From Existing Document, you will be asked to specify the document, in which case you should click Open, select the document, and click Open:
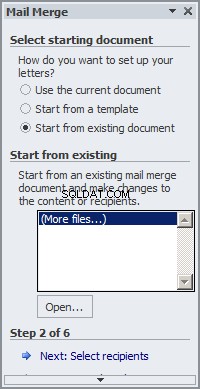
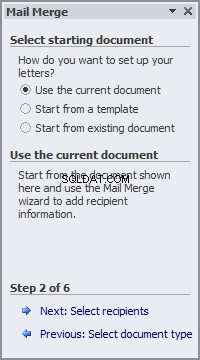
After this, the Mail Merge window would come back to the Use Current Document option. Click Next:Select Recipients.
To insert other types of items, in the Mail Merge window, you can click the Address Block link, the Insert Address Block dialog box would come up. The Insert Address Block dialog box is made of various sections. It allows you to specify a type of greeting and other pieces of information to be inserted in the document. After making the selection(s), you can click OK.
After creating the document and adding the necessary fields to it, you can preview and review it. To do this, in the Mail Merge window, click the Next:Preview Your Letters link. When you do this, the letter appears with the value(s) of the first record. To review the document with the other values, in the Mail Merge window, you can click the previous 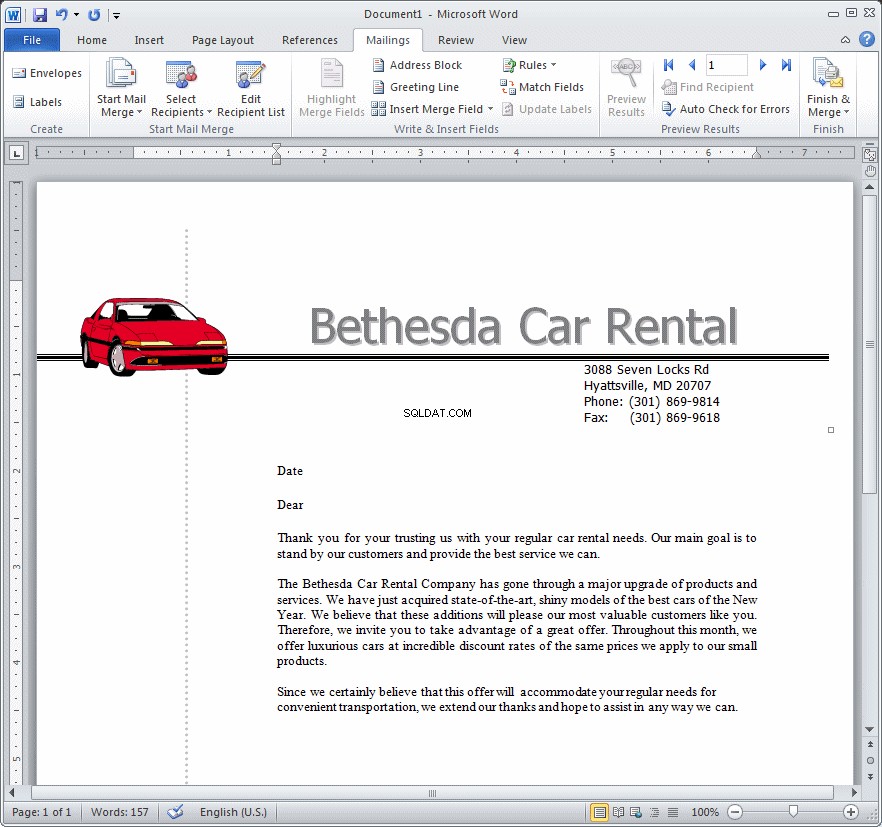 or the next
  buttons.
After reviewing the document, in the Mail Merge window, you can click the Next:Complete The Merge link. You can then save, print, and manage the document. In the same way, you can create labels or envelopes.
Practical Learning:Creating a Mail Merge
- Start Microsoft Word
- From the resources that accompany these lessons, open Promotion.docx
- Press Ctrl + A to select everything
- Press Ctrl + C to copy
- Close Microsoft Word and return to Microsoft Access
- From the resources that accompany these lessons, open the Bethesda Car Rental1 database
- In the Navigation Pane, in the Tables section, click Customers
- To start a mail merge, on the Ribbon, click External Data
- In the Export section, click Word Merge
- Click the second radio button:
- Click OK.
Microsoft Word starts. - In Microsoft Word, press Ctrl + V to paste the Promotion.docx document (this would be the equivalent of creating or designing the document)
- In the Mail Merge window, to create a letter to be sent out, accept the Letters radio button
Click Next:Starting Document - In the Select Starting Document section, make sure Use the Current Document is selected Click Next:Select Recipients
- Click Next:Write Your Letter

- In the Microsoft Word document, double-click Date and press Delete
- On the Ribbon of Microsoft Word, click Insert
- In the Text section, click Date &Time
- In the Available Formats list box of the Date &Time dialog box, click the second option (day, month, and year)
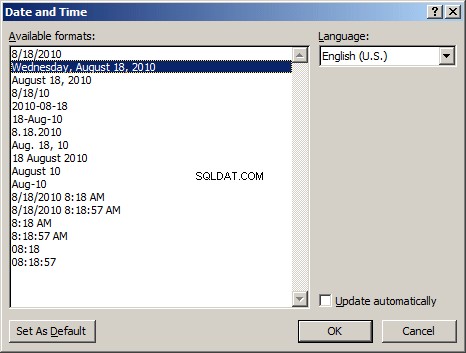
- Click OK
- Press Enter
- Click the right side of Dear
- In the Mail Merge window, click More Items
- In the Fields list, click FirstName

- Click Insert
- Click Close
- Press the Space bar
- In the Mail Merge window, click More Items...
- In the Fields name, double-click LastName
- Click Close
- In the Mail Merge window, click Next:Preview Your Letters

- In the Mail Merge window, click the next recipient button
 and observe the name in the document
 - Click the next recipient button 4 times and observe the names in the document
- Click the previous recipient button 2 times and observe the names in the document
- In the Mail Merge window, click Next:Complete the Merge
- Close Microsoft Word
- When asked whether you want to save, click Save
- Set the file name as Bethesda Car Rental Promotional Campaign1
- Click Save
- Close Microsoft Access
Sharing a Microsoft Access Database
Distributing the Database
Distributing a database consists of making it available to more than one computer. Both Microsoft Windows and Microsoft Access provide various solutions, One solution is to install Microsoft Access on each computer that will use your database. This may be the most expensive solution but it is the easiest. Most companies use that solution because it is easy either to purchase many copies or get many licenses of Microsoft Office Professional that includes Microsoft Access.
After creating a database, in the server or the computer of your choice (normally, the database can be located on any computer that is a member of your network) where you want the database to be located, create a folder. Copy the database file into that folder
Access the drive that holds that folder. To share it, right-click it and click Share:
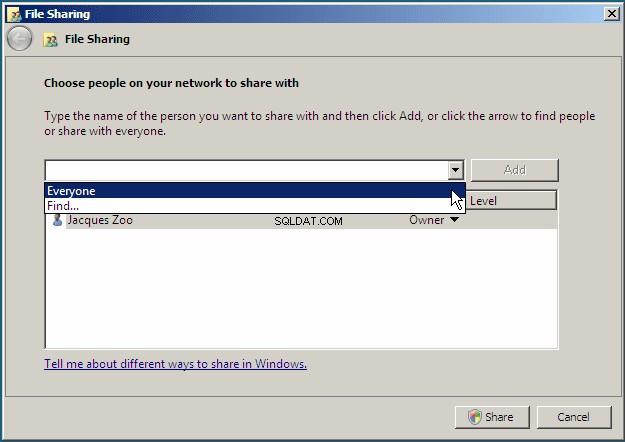
Click the arrow of the combo box in the File Sharing window and select Everyone:
After selecting Everyone, click Add. Click the down-pointing arrow on the right side of Everyone:
- If you are sharing from Microsoft Windows Server 2008, select Contributor
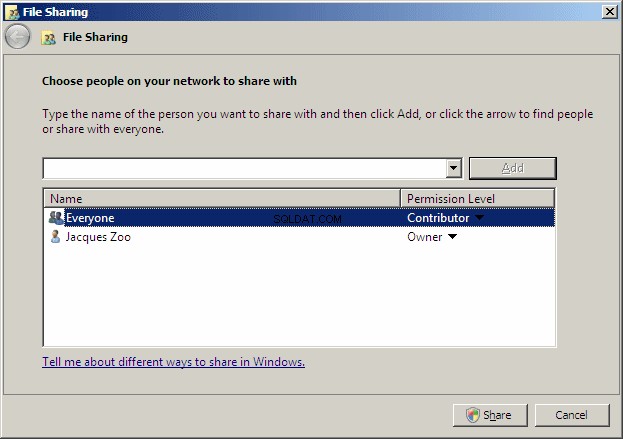
- If you are sharing from Microsoft Windows 7+, select Read/Write
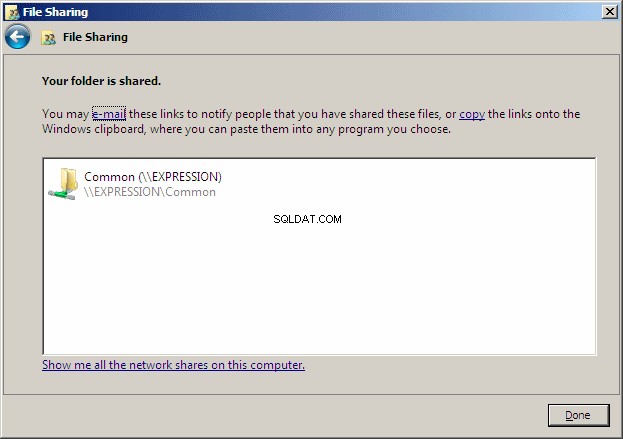
Click Share. If you receive a message box, click Continue.
You should receive a message box telling you that the sharing was successful
Click Close.
In another computer where you want to access the database, open a file utility such as Windows Explorer. Click Network. Click the name of the computer to show its shared folders. Open the folder that contains the database. Right-click the name of the database, position the mouse on Send To, and click Desktop (Create Shortcut)
As an alternative, you could right-click the database and click Create Shortcut, then copy that shortcut where you want the database to be accessible. To open the database from that computer, double-click the shortcut.
Importing or Splitting a Database
Introduction
Importing data allows you to get information from an external source and insert it in your database. Microsoft Access can accept data from various applications. To import a file or objects, on the Ribbon, click the External Data tab:
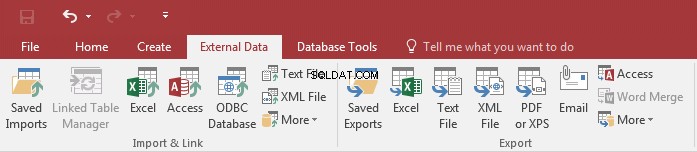
In the Import section of the Ribbon, click the button that corresponds to the type of object you want to get. What happens depends on the type of file you are trying to import.
Importing Microsoft Access Objects
To import objects from another Microsoft Access database, on the Ribbon, click External Data. In the Import section of the Ribbon, click the Access button . This would open the Get External Data - Access Database wizard. You should first locate the folder that contains the database, and then select the database.
Splitting a Database
You can divide your database in two parts. One part would be installed on one computer that can be a server or just another computer. This is referred to as back-end. The other part would be installed in each user's computer. The users computers can then connect to the back-end database that stores the actual database. The users computer have only the graphical interface that allows them to work. To implement this scenario, you split your database.
To split a database, on the Ribbon, click Database Tools:
In the Move Data section, click the Access Database button  . This would open the Database Splitter dialog box with four paragraphs and two buttons:

After reading them, click Split Database and follow the wizard.
Practical Learning:Splitting a Database
- From the resources that accompany these lessons, open the Computer Training Center database.
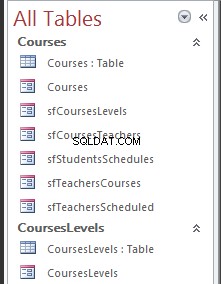
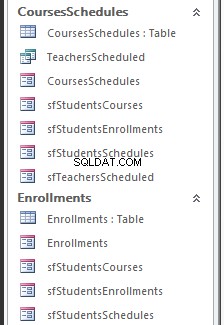
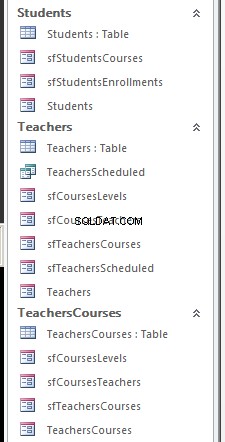
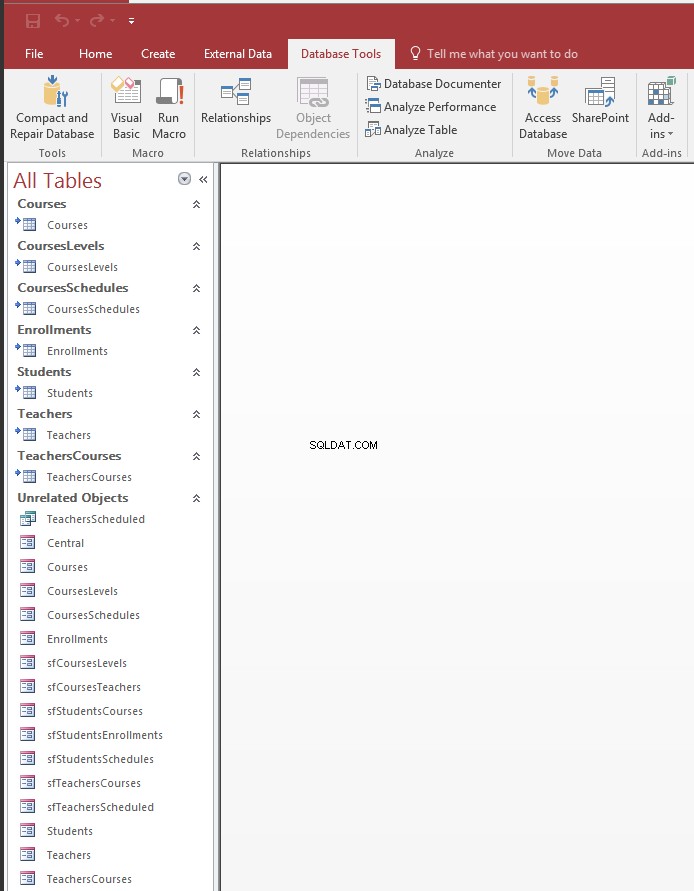
Notice the objects in the Navigation Pane
- On the Ribbon, click Database Tools
- In the Move Data section, click Access Database
- You receive a Database Splitter dialog box. Read the paragraphs and click Split Database
- In the Create Back-End Database dialog box, change the name of the file to ComputerTrainingCenterBackEnd
- Click Split.
When the splitting is over, a dialog box appears
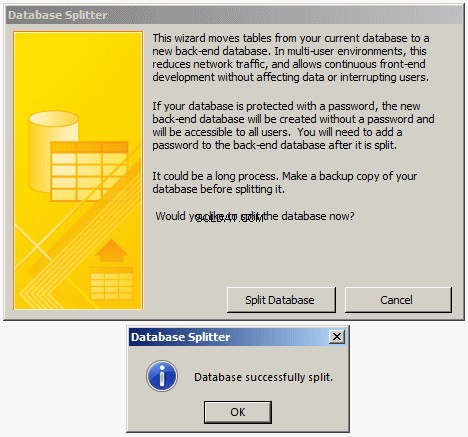
- Read it and click OK
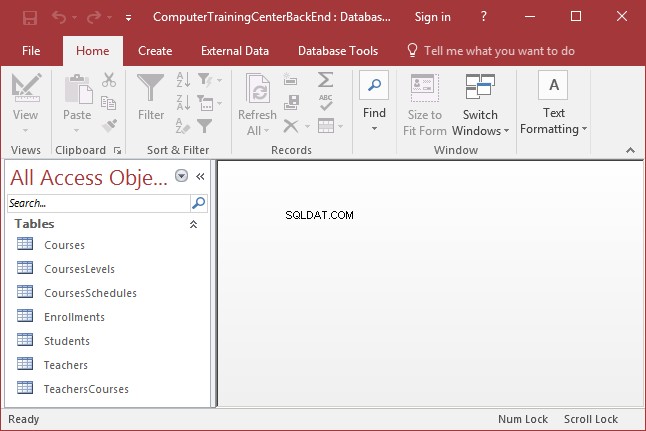
- Open the ComputerTrainingCenterBackEnd database. Notice the icons of the tables in the Navigation Pane
- Re-open the Bethesda Car Rental5 database and notice the new icons of the tables in the Navigation Pane
- Close Microsoft Access